Potato Pitta
Posted: February 11, 2014 Filed under: Bread, Budget, Deja Food, Side Dishes, Traditional 9 Comments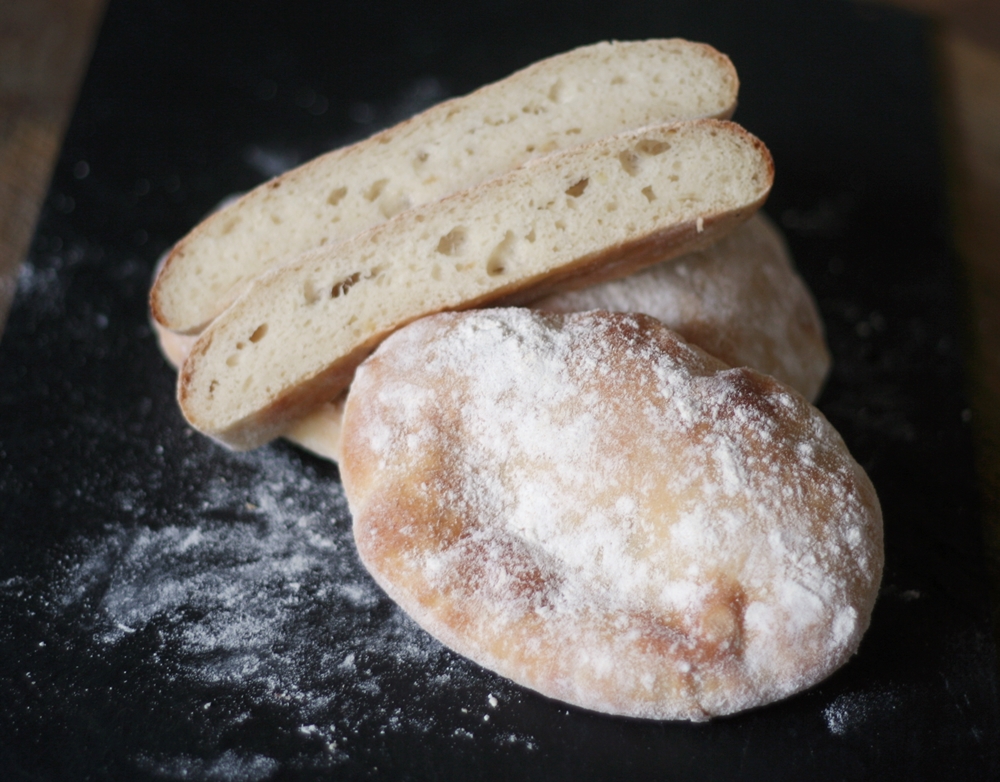
Wotchers!
I love pitta bread – it reminds me of my years in the Middle East. Plus it’s always fun to have a sammich with the filling all neatly tucked away in a pocket: filling integrity being a very serious matter in the business of sandwich – and sammich – crafting.
The one niggle I have with regular pitta, is opening it to make room for the filling. It’s always a good idea to lightly toast your pitta under a grill before you try splitting it open. Hopefully, it will puff up and make the job a little easier. If it doesn’t, then you have to cut it open by hand and here’s where I get a little grumpy: there’s always a thin side and a thick side, and it only takes the slightest slip of the knife to poke a hole through one side and then your pocket has sprung a leak.
Not so with these beauties. For a start, they’re a little thicker than regular pitta, which means there’s actually some soft insides to slice through. Let me briefly digress into some advice on cutting pitta pockets. Some people favour cutting all down one side, but to my mind, this isn’t the best approach. Sure, it might give you a wide pocket into which to stuff your favourite fillings, but in doing so, you lose the structural integrity of the pitta and it becomes a two-handed juggle to keep everything from spilling out. Much better to take the bull by the horns and cut directly across the middle – which gives two pockets, each with a lovely straight opening and a well-formed structure for your filling. It might require a little more care in filling, but once it is in, it’s not going anywhere except in your mouth. You only need one hand to hold it, too. There’s also a real likelihood that I have spent WAY too much time thinking about this.
ANYHOO…..
Another attraction of these breads is that they’re deliciously soft, and remain so way past the shelf-life of regular pitta breads. The last of the previous batch I made stayed pillowy right up until I spotted a little mould starting – 9 days after baking!
They’re incredibly versatile – as well as sandwich pockets, lightly toasted and cut in ‘soldiers’ they’re great for dipping into hummus, moutable salad (roast aubergine + tahini, aka baba ghanoush), even a soft boiled egg. and they also make fab ‘instant’ pizza bases.
Lastly, they’re a great Deja Food. You can, of course, cook potatoes especially to make these, and their warmth will then assist the yeast in making the dough rise. However, you can just as easily use potatoes from previous meals with no discernible difference in the resulting bread. The batch in the photograph was made using the insides of 2-day old baked potatoes – once riced, I zapped them in the microwave for 30 seconds to warm them up a little before adding to the rest of the ingredients. Simples!
Potato Pitta
Makes 12 fluffy pitta breads.
350g cooked, riced potato
2 sachets fast-action yeast
2tsp caster sugar
1tsp salt
250ml whole milk
50ml vegetable oil
400-500g strong white bread flour
- If the potatoes are cold, warm them briefly in the microwave for 30-45 seconds and tip into a large bowl.
- Add the yeast to the potatoes.
- Warm the milk to blood temperature.
- Add the sugar and salt to the milk and stir to dissolve.
- Add the oil to the milk, mix briefly, then add the liquids to the potatoes and yeast.
- Stir to combine.
- Gradually mix in the flour until a soft dough is achieved. From all the times I’ve made this, it’s pretty much 400g of flour that is needed, but a lot depends on the moisture content of both the flour and the potatoes. It’s better to have the dough too soft than too dry, so proceed with caution one 3/4 of the flour has been added.
- Cover with cling film and leave to prove for 1 hour.
- Tip out the risen dough and pat out the air.
- Form into a ball, cover lightly with a cloth and allow to rest for a further 30 minutes.
- Preheat the oven to 200°C, 180°C Fan.
- Divide the dough into 12 even pieces and shape into balls. It’s worth taking the trouble to weigh the dough and divide it evenly, so that the breads are all of a similar size and therefore cook evenly. Don’t go mad with it, though – within 5g is plenty close enough.
- Use a rolling pin to roll the dough out into oval pitta shapes. They want to be fairly thin – no more than 1cm in order to keep them pitta shaped once baked, but again, don’t get too precious about it – “that’ll do” is fine.
- Arrange on baking parchment-lined baking sheets and dust liberally with flour.
- Bake for 15 minutes, turning the baking sheets around after 10 minutes, to ensure the breads bake evenly.
- Cool on the baking sheet, covered with a clean cloth, to ensure the crust stays soft and pillowy.
