Favourite Things
Posted: October 6, 2025 Filed under: Budget, Desserts, Gluten-Free, Mains, Rice | Tags: Budget, gluten-free, MealIdeas, quick, simple, suppers, weekday 3 Comments
Wotchers!
A bit of an unusual post today, because it’s not so much a new and exciting discovery, rather items from my cupboard that I use when I’ve got distracted by tantalising food stories or gone down a particularly intriguing recipe rabbit-hole. Many’s the time I’ll resurface from being nose-deep in, say, an 18th century manuscript, and suddenly realise I have 30 minutes to get a meal on the table.

I use these items all the time and, with apologies to my international readers, they’re kinda UK-specific, but I hope that even if the brands themselves aren’t available where you are, you might find some inspiration to throw together a similar “Hail Mary” meal using your own local ingredients.
You’ll notice they’re sourced from different supermarket chains, and we have several in our town, and sometimes the weekly shop is done at one, and sometimes at the other, because the rule in this house is whoever is DOING the weekly shop, gets to choose where they go. We also have other supermarket chains, which are convenient if passing, or have occasional special deals, etc., but in terms of weekly routines, you shop, you choose.
Brown Basmati Rice
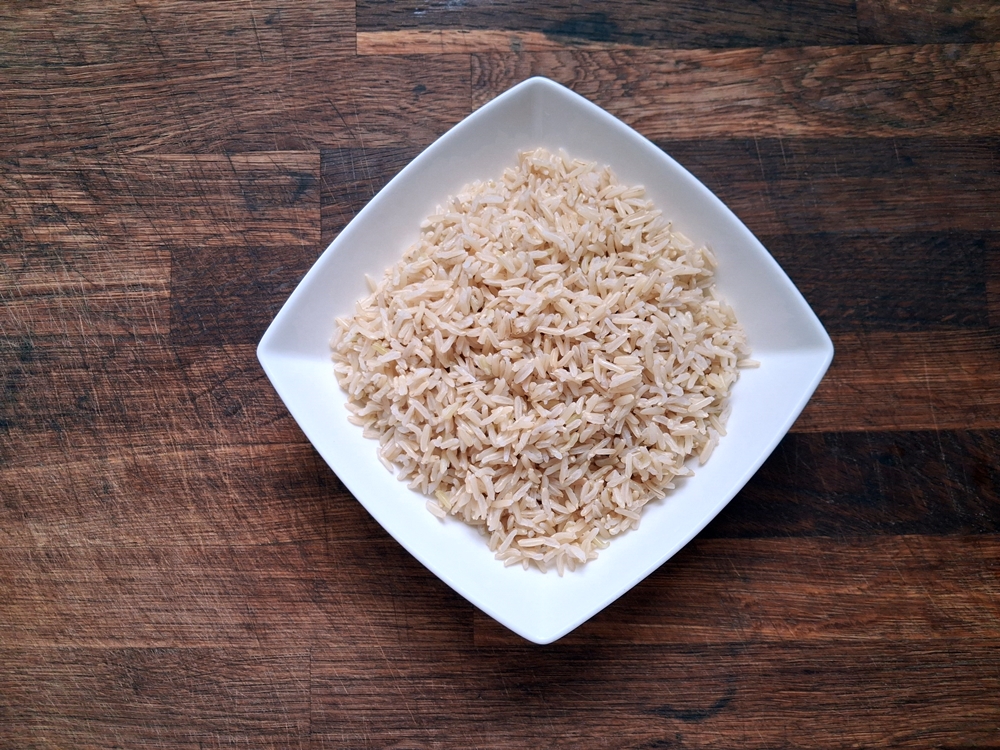
I’m starting off with a staple, because having it cooked and ready to go in the fridge works wonders when you’re in a time-crunch to serve up something hot and delicious. I have another post on the blog detailing how to cook rice, that reduces the cooking time to about 4 minutes. Which is great, you might think, in these circumstances, but no. That method involves soaking the rice for at least 30 minutes, but preferably much longer. It also involves rinsing your rice very thoroughly in order to remove all traces of rice flour that have been created as the rice jostled against itself whilst being transported from where it grew. Failure to adequately remove this rice dust before cooking will lead to gloopy rice. In this scenario, brown Basmati rice is your friend. Your hero, even. And I’ll tell you why. Not only is it good fibre for you, it is also the easiest rice to cook.
Method:
- Boil water.
- Add rice.
- Cook 20 minutes.
And that is it. No rinsing, no washing, no soaking. I literally pour it straight out of the bag and into the boiling water, set a timer and don’t think about it until the time goes off. Because we don’t measure either, and my recommendation is to always cook more than you need – it stores in the fridge beautifully, and then you have it ready for curries or stir fried dishes (see below) or whatever. Another bonus is the lack of steaming recommended for white rice, where after cooking, it is left in the pan, or sieve, covered with a lid or cloth, and left to steam in its own heat for 10-15 minutes in order for the grains to separate. No such Faffing About™ with brown Basmati rice: boil, drain, and boom! Each grain beautifully separate from one another, piping hot and ready to go.
Top Shopping Tip: Check out the rice in your favourite shop’s International Aisle. Not only is rice available in much larger bags there (up to 10kg), but it is also significantly cheaper (also true for spices, pulses and bags of nuts). Example: In one of my local shops, a 1kg bag of Tilda Brown Basmati rice is £5.00, but round the corner in the International aisle, a 2kg bag of Laila Brown Basmati rice is £5.50.
So go ahead and cook a batch of brown Basmati rice today – your future self will thank you.
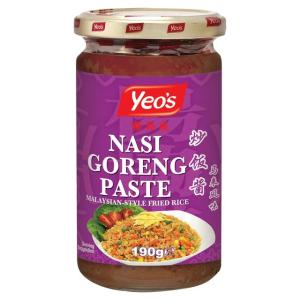
Yeo’s Nasi Goreng Paste
Spoiler Alert: Not every meal cooked in this household is crafted by hand from original ingredients.
I know. Clutch those pearls.

There’s a time and a place for faithfully recreating a dish with authentic ingredients, and 30 minutes before supper is due ain’t it. This is the moment you fling open your cupboard and welcome Yeo’s Nasi Goreng paste (available at Sainsbury’s [not a sponsor, but you never know!] or specialist shops) into a warm embrace. I love a one-pot meal, and if a ready-made sauce can help bring that about in under half an hour, then I’m already a huge fan. Alas, not all ready-made sauces are created equally. Or rather, a lot of them are because they tend to just merge into a disappointingly bland, middle of the road amalgum that has me wishing I’d just bitten the bullet and done it myself. Not so this Nasi Goreng paste – for it is deliciously spicy, yet doesn’t blow your head off. Its flavour profile leaves you knowing you’ve had a tasty Indonesian treat.
It goes incredibly well with a range of proteins – chicken, prawn, pork, beef, probably tofu too (although we’ve not tried that yet) – and with your precooked cold Basmati rice in the fridge and a few veggies, you’ve got the making of a banquet on your hands in next to no time! Bonus: it reheats fantastically well, so freely over-cater and portion out some ready made meals in the fridge or freezer.
Nasi Goreng
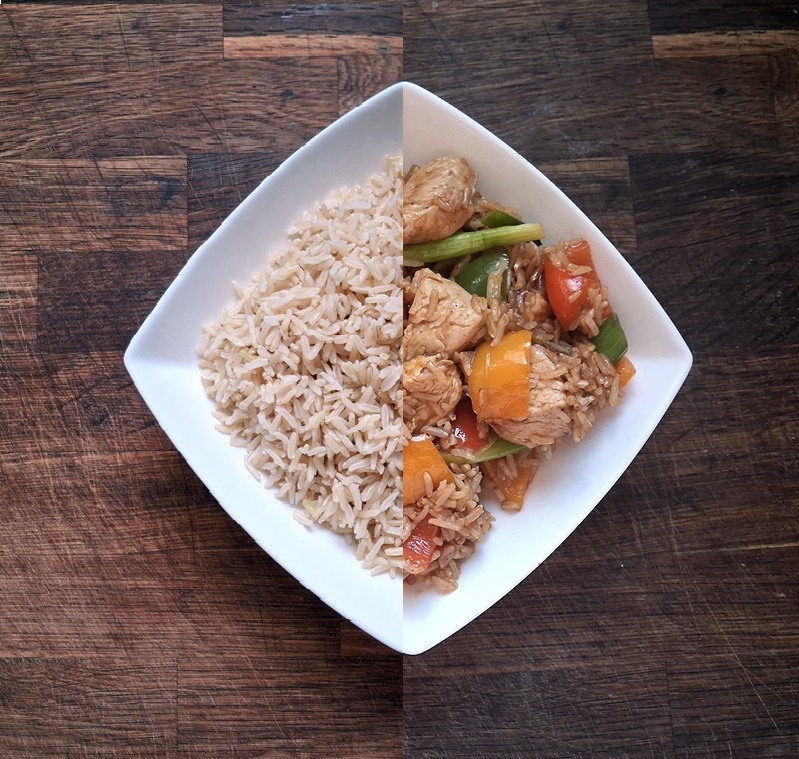
For four portions – more if you’re generous with rice and veggies. I do like a significant level of rice in such dishes so that the veggies and protein then become pops of flavour in each mouthful of savoury rice.
Serving 4 generously
300-400g of protein – chicken, pork tenderloin, turkey breast, beef (not diced – its invariably tough and unsuitable for stir-frying), or hard-boiled/fried eggs
cold, cooked Basmati rice
1 jar Yeo’s Nasi Goreng Paste
sweet peppers – sliced/diced
spring onions – trimmed and split lengthways
brown/red onions – peeled and sliced vertically
2tbs-ish vegetable oil
1-2tsp roasted sesame oil (optional)
- Prepare the vegetables. I like to keep the vegetable pieces quite large, so that there’s still some bite left to them.
- Heat a pan and add the oil(s), followed by the vegetables. Cook them over medium heat, stirring them occasionally.
- Prepare your protein by cutting into pieces similar in size to your vegetables.
- In another pan, add the nasi goreng paste and heat.
- When the paste is bubbling, add the meat and stir over medium-high heat until cooked. NB If just using egg, skip this and proceed to heating the rice.
- Add in the cold rice and continue to stir fry until the rice is heated through and toasted.
- Fold in your vegetables. Stir well to combine.
- Add egg if using, and serve.
Cost Example (Sainsbury’s): £8.12 – £2.03 per generous serving
- Nasi Goreng paste: £2
- 250g(raw)/750g(cooked) Laila brown Basmati rice: 69p
- pork tenderloin (460g): £3.22
- 600g Basics pack of peppers: £1.60
- 4 brown onions: 50p
- a little vegetable oil: 11p
Turkey & Chorizo with spicy pesto
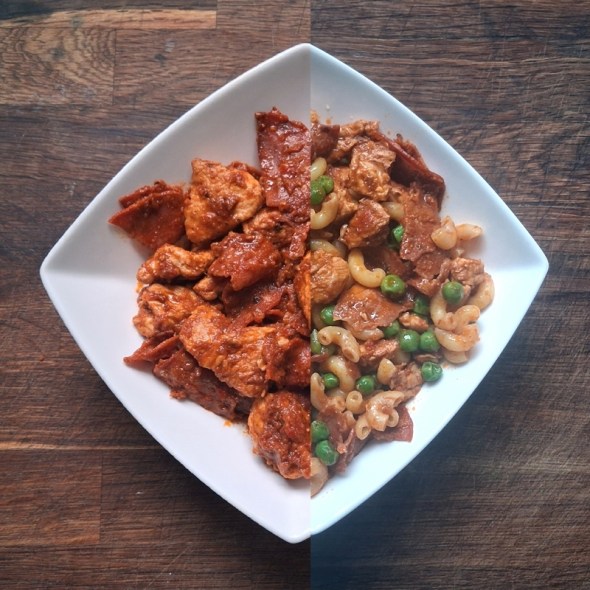
This recipe is an adaptation (i.e. I got lazier) of this recipe for Turkey & Chorizo Spirals, which we have enjoyed in this household for many years. The original recipe is, however, a bit of a Faff™, thus the new version evolved.
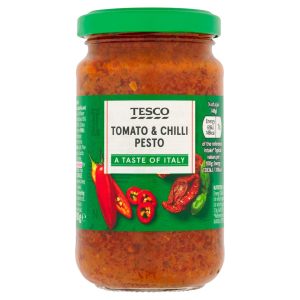
It was helped on its way by an accidental purchase of Tomato & Chilli Pesto (available at several stores, but after trying a range of other brands, the Tesco one [not a sponsor – but call me!] has the best flavour IMHO), instead of the regular one, because it was right next to it on the shelf and looked almost the same.
The combination of just three ingredients makes for a very flavourful meal, and one which can be brought together in no time. The basic mixture can be served over some of your reheated handy-dandy brown Basmati rice, or alongside some steamed broccoli/cauliflower/green beans. Alternatively, as in the picture, cook some macaroni (or other pasta) and frozen peas and stir all together for a satisfying bowl of comforting deliciousness you can eat with a spoon.
Serves 4 generously
1 small pack (16 slices) spicy chorizo – Tesco’s have the best flavour/are the spiciest. You could also use a pack of diced chorizo (not tried that yet)
1 jar Tesco Tomato & Chilli Pesto
400-ish g of lean turkey breast slices/pieces.
300g frozen peas (optional)
250g uncooked macaroni/other pasta
- Boil water. Cook your pasta. Throw in your frozen peas for the last 3 minutes of cooking. Drain. Set aside and keep warm.
- While the pasta is cooking, cut your chorizo slices in half with scissors.
- Here we come to a bit of a crossroads. My daughter (who took this recipe to Uni with her) prefers the cooking method I originated. Choose whichever appeals:
- Her:
- Put the chorizo slices in a pan over medium heat. As the pan heats up, the spiced fat from the slices will be released.
- Cut the turkey into bite-sized pieces and add to the pan. Stir.
- When the turkey is cooked, add the pesto and stir to coat until heated through.
- My evolution of the method:
- Throw everything in the pan at once and stir over medium heat until cooked.
- Her:
- When pasta and peas are cooked, drain and add to the pesto pan and stir together.
- Enjoy.
Costing Example (Tesco): £7.86 – £1.97 per serving.
- 1 jar Tesco Tomato & Chilli pesto: 99p
- Tesco 16 Spicy Chorizo Slices: £1.10
- Tesco Mini Turkey Breast Fillets 400g: £5.10
- 250g gluten-free macaroni: 38p
- 300g frozen peas: 29p
Snack Cheesecake
I’m the only person in this house that likes cheesecake. (Oooh, I’m on an oversharing ROLL this week!) Consequently, the opportunities to enjoy a slice or two are few and far between.

That is, of course, an overly-dramatic exaggeration, because the neighbours are big fans, and so I don’t actually HAVE to eat an entire cheesecake myself.
ANYHOO…
Over the years I’ve devised a great little snack that is, relative to a full-on cheesecake – delightfully low calorie, and brimming with flavour. There are just three ingredients: Lemon yogurt, lemon curd, crisp biscuit.
Lemon Yogurt

This is the best lemon yogurt I’ve ever tasted. Tangy, not too sweet, delicious. But too liquid for a cheesecake. However, if you drain out the liquid, it thickens up almost to a cream-cheese consistency, that can be spread or piped onto a biscuit base.
To drain the liquid, line a sieve with several (5-6) sheets of paper towel, and empty in the whole pot of yogurt. Cover the surface of the yogurt with cling film to avoid it drying out too much and becoming crusty, and set aside over a bowl for several hours. Even though there are many sheets, they will soon absorb as much liquid as possible. When the towels have reached their absorbtion capacity, change them out for six more and set aside again (overnight in the fridge is fine). You can repeat this again, if needed, until it reaches the consistency you’re happy with. Store in an airtight container for ease of snacking.
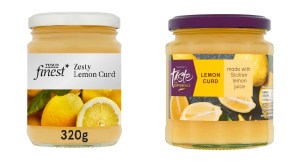
Lemon Curd
If you have some in the house, homemade or otherwise, then you’re set. Otherwise, you can use this recipe made with honey, which is less aggressively sweet than that made with sugar, or this recipe, which is vegan. Alternatively, I can vouch for either of these ready-made versions from Tesco or Sainsbury’s.
Biscuits
Obviously, McVities Digestives are the classic choice, however I’ve lately been trying gluten-free versions of various biscuits, in order to be able to recommend those I find acceptable. And I have to say, the Scottish company Nairn’s (no, still not a sponsor) have got a great line. The main sticking point with gluten-free, I’ve found, is a lack of crunch, whether it be bread or biscuit. Nairn’s, being experts in all things oaty, have some cracking oat biscuits in their gluten-free range, that have crispness and a crunch that even those not glutenly-challenged will appreciate. Their latest tasty product, which you can see in the photo above, is a Lotus biscuit-type called Moments, which pair especially well with the other lemon flavourings we have here.

To Assemble your Lemon Cheesecake snackette
With the above ingredients
- Spread your biscuit of choice with a generous layer of lemon yogurt ‘cheesecake’.
- If you’re feeling fancy, pipe a border around the edges.
- Top (or fill) with a spoonful of lemon curd.
- Add a second biscuit as a ‘lid’ if you like, but to be honest, if your biscuit is crisp, biting into your cheesecake ‘sandwich’, will likely squidge everything out the sides. I recommend going ‘open-faced’.
